Categories
Categories help your customers to navigate around your online store.
A category is a means of organizing group-specific material under a single umbrella. Product categories make it easier to locate items in searches and through navigation.
Before entering the data in the various fields, please review the Field Validation section that is associated with the last sheet.
The Home and Header categories will be available by default, Newly created subcategories must be mapped under the Home or Header categories to be displayed under the respective categories in the storefront.
Use the search function to filter certain Category.
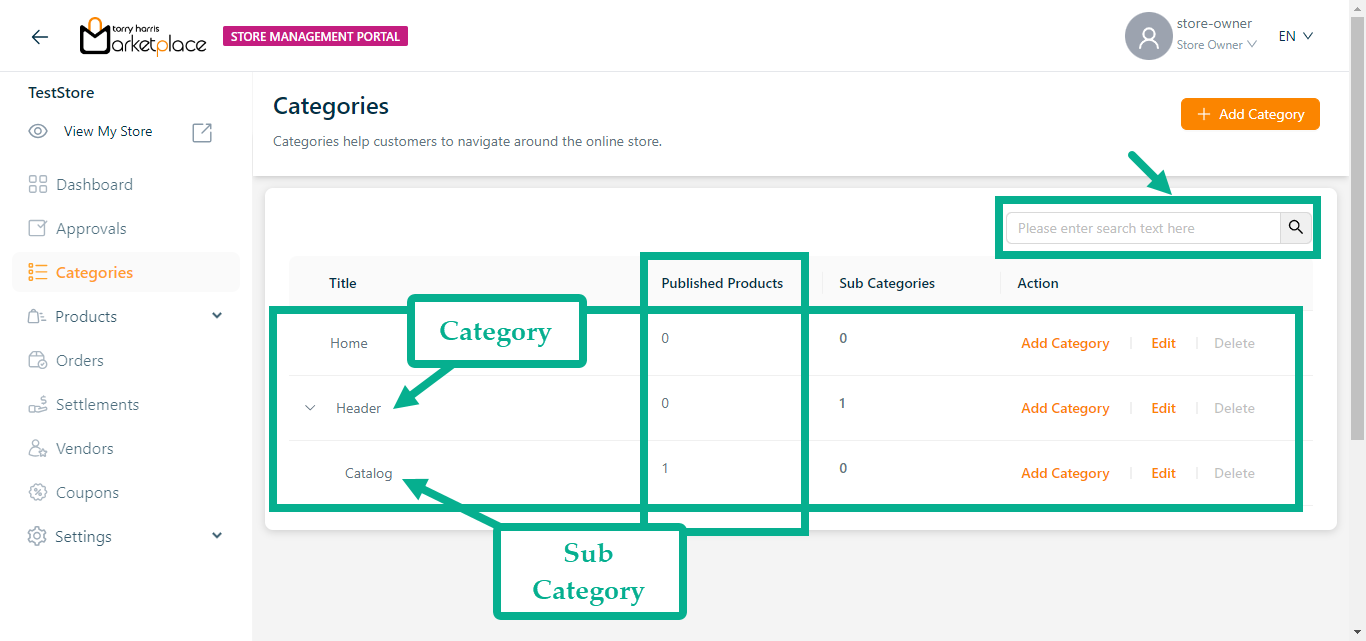
The Published Products count refers to the specific category or subcategory and also when mapping the template itself, products published under that template will also be taken into consideration and their count will be increased.
Default category/subcategory can't be deleted.
There might be one or more subcategories within a category.
The main purpose of showing sub-categories is to assist the user in making a better-educated decision on which category scope to explore.
Adding a Category
- Click Add Category.
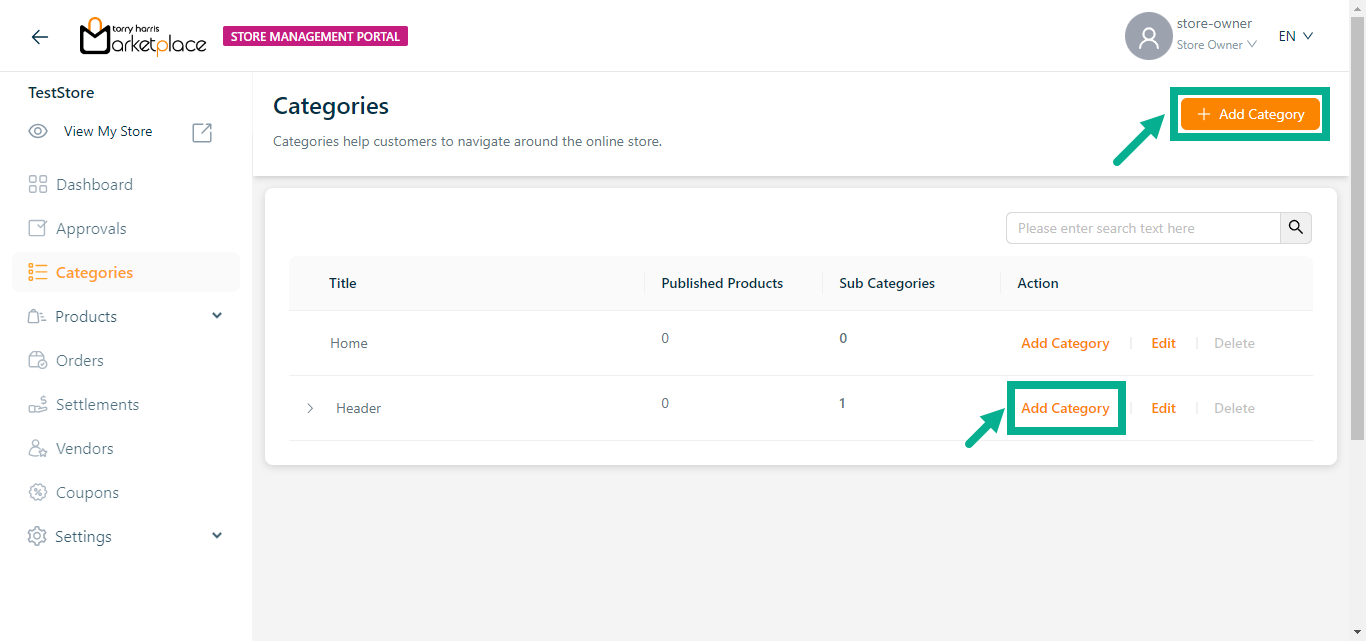
Click Add category icon to add a sub category to the parent category.
Add a Category screen appears as shown below.
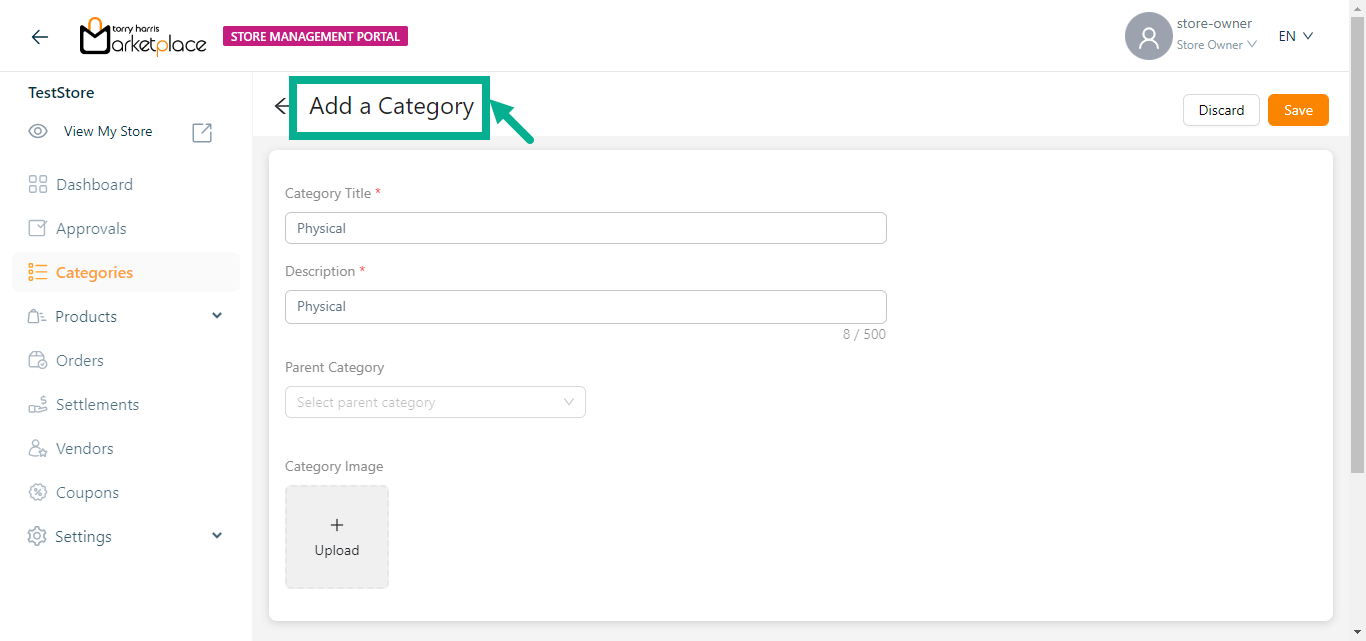
- Enter the Category Title and Description.
To create a sub category, choose the Parent Category from the list. The subcategory will be created under the selected parent category.
- Click Upload (+) to upload a category image.
The Upload File dialogue box appears as shown below.
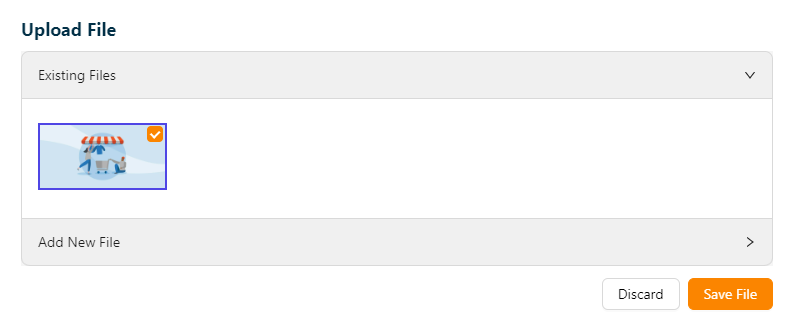
- To select an existing image, click the corresponding check box in the Existing Files section.
Else,
- Choose a file from the local disc by clicking the Choose File button in the Add New File section.
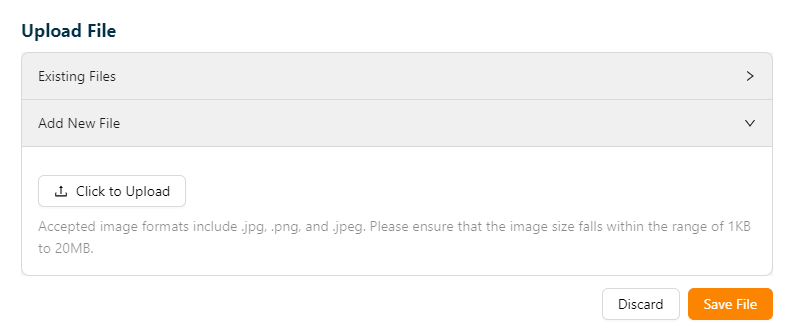
- Click to Upload the image.
- After uploading, click Save File.
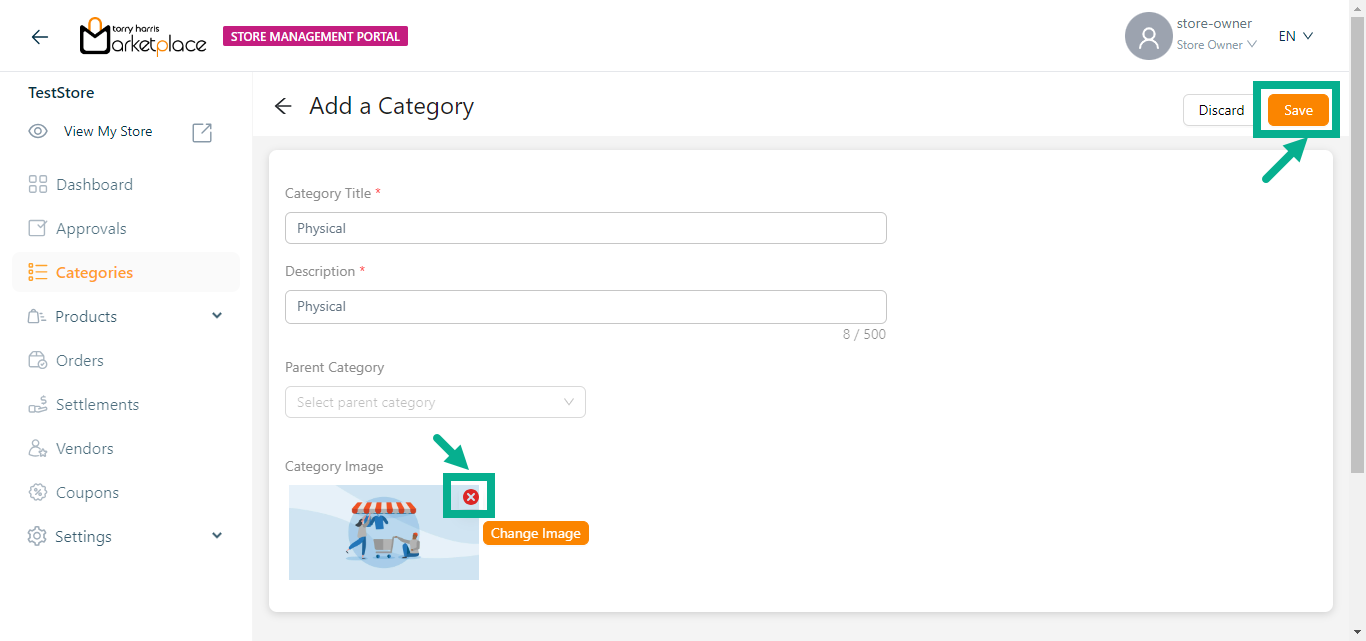
- Click Remove icon to remove the added image if necessary.
- Click Change Image to change the category image if necessary.
- Click Save.
On saving, the confirmation message appears as shown below.

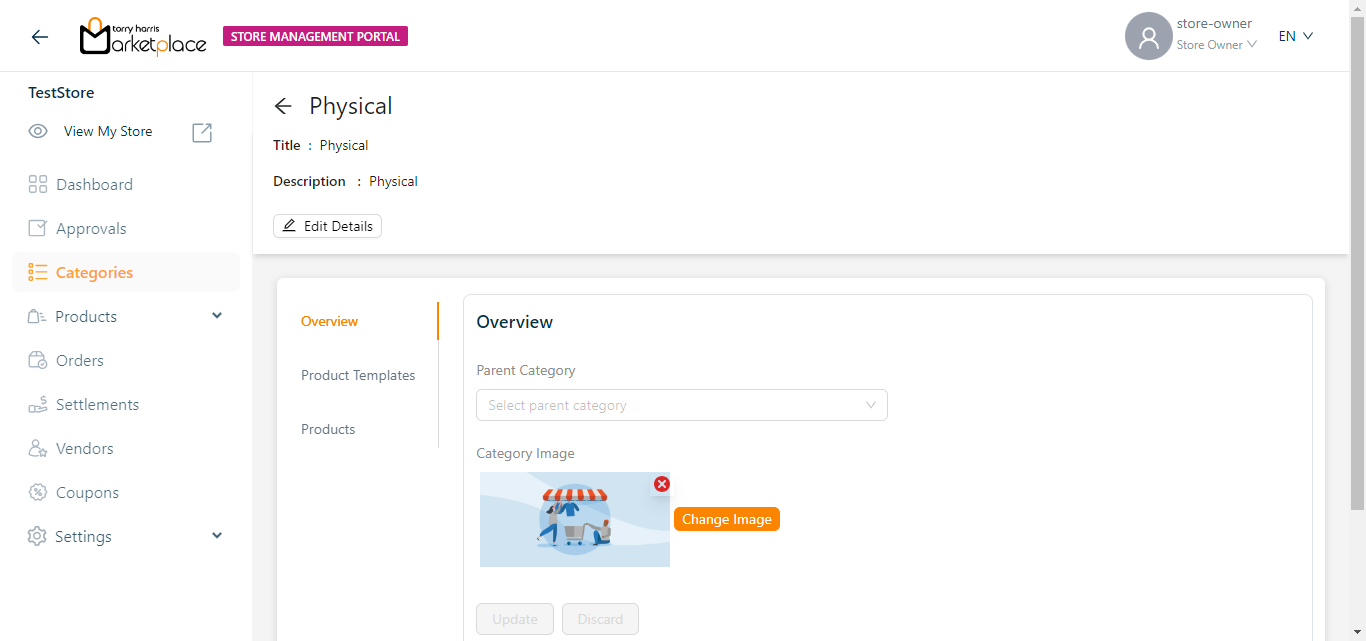
The newly created category appears as shown below.
- Click Product Template tab and click Add Product Templates to add the product template to the category.
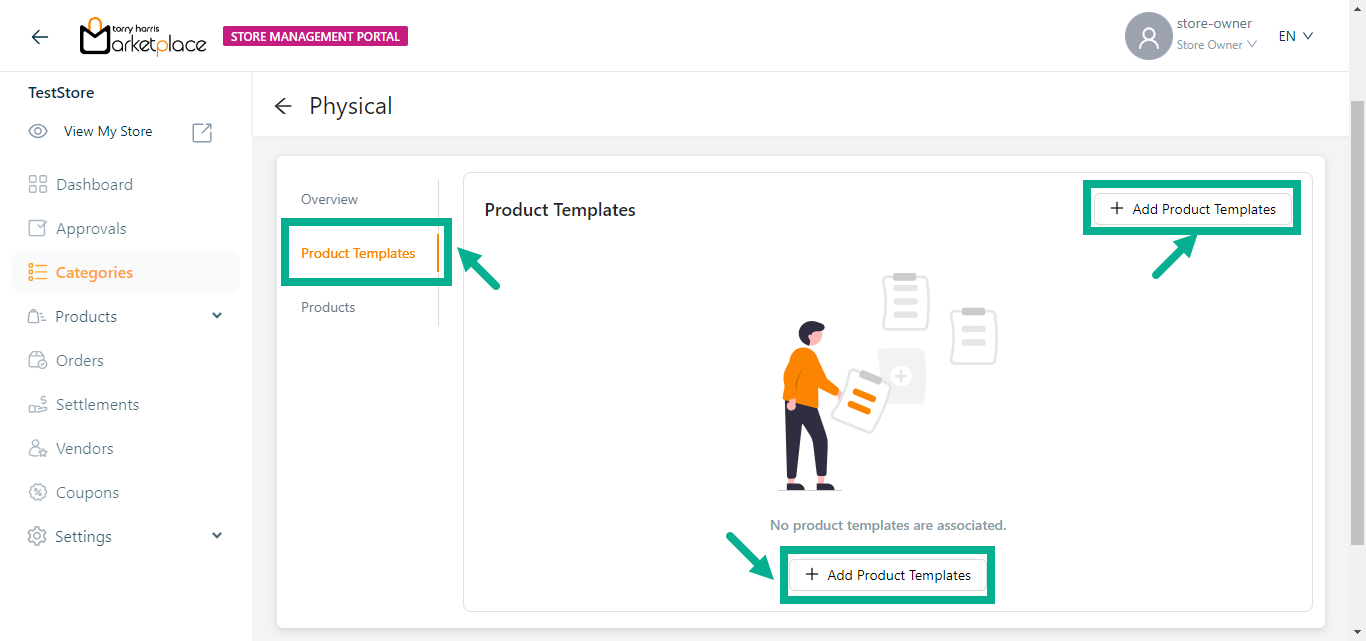
Add Product Templates screen appears as shown below.
Use the search function to filter certain product templates.
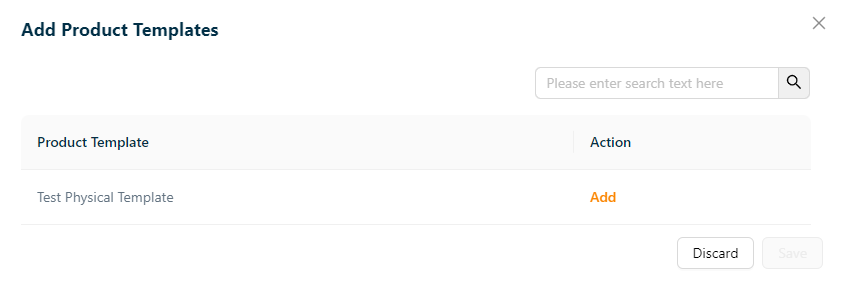
- Click Add and Click Save.
On saving, the confirmation message appears as shown below.

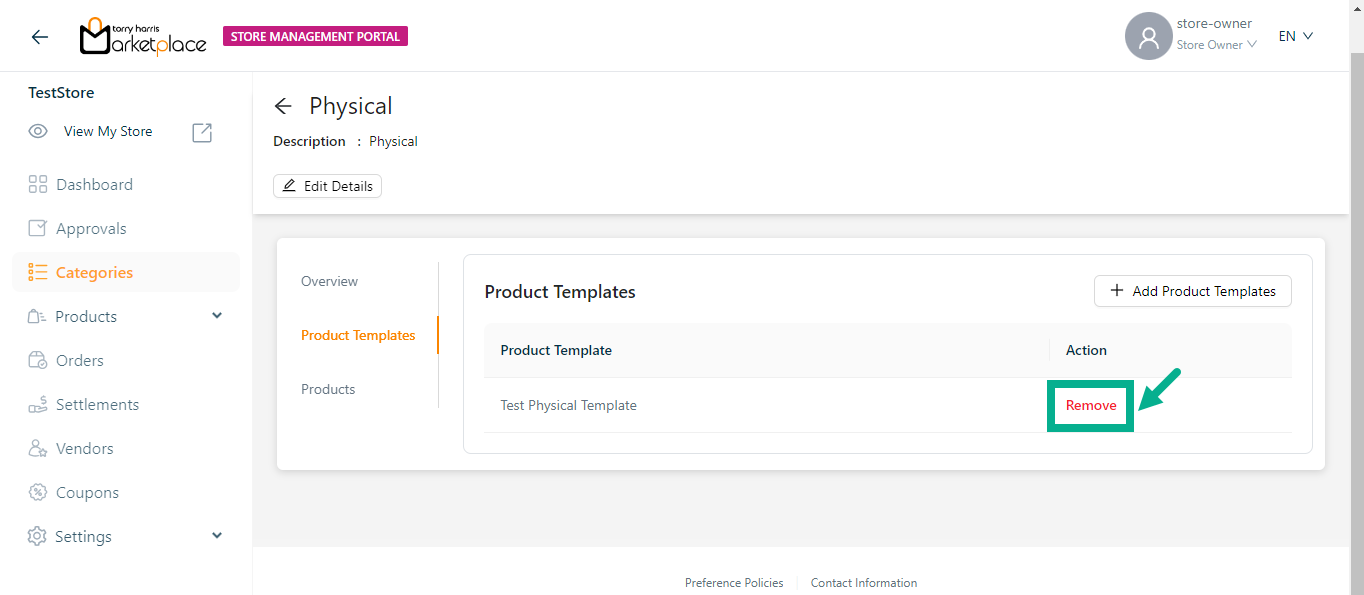
Click Remove button to remove the added product template.
A category or a subcategory can have many product templates added to it.
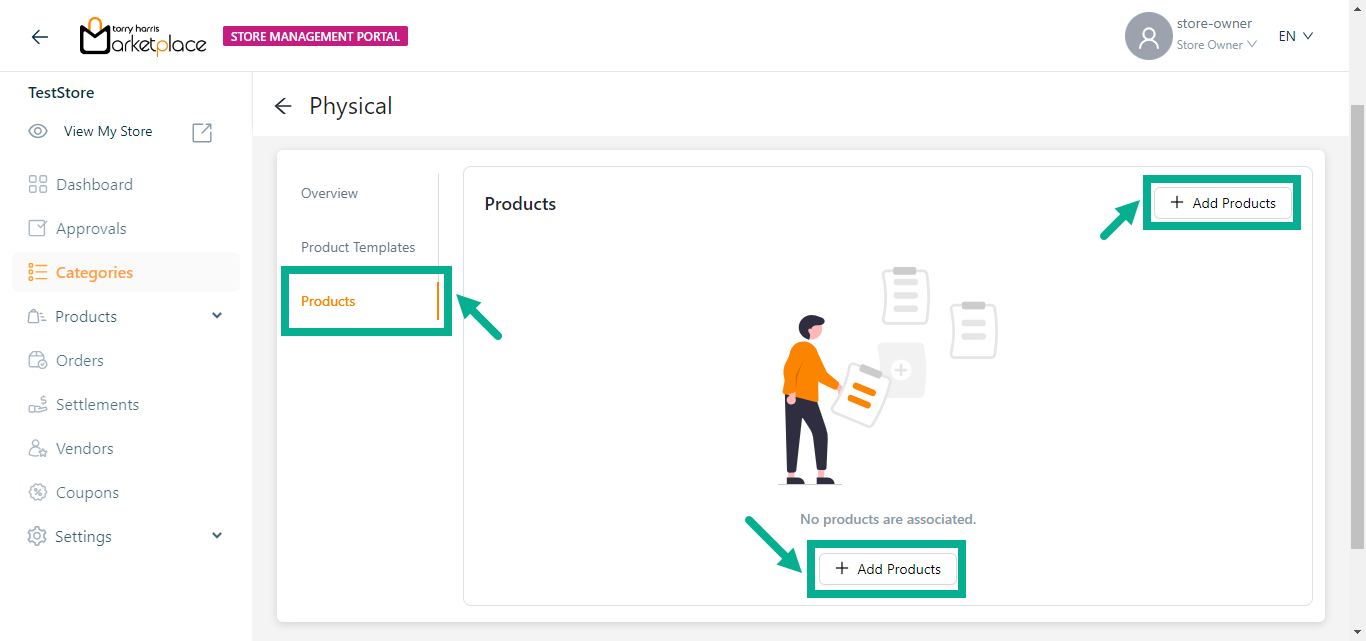
- Click Products tab and click Add Products to add the product to the category.
Add Products screen appears as shown below.
Use the search function to filter certain product.
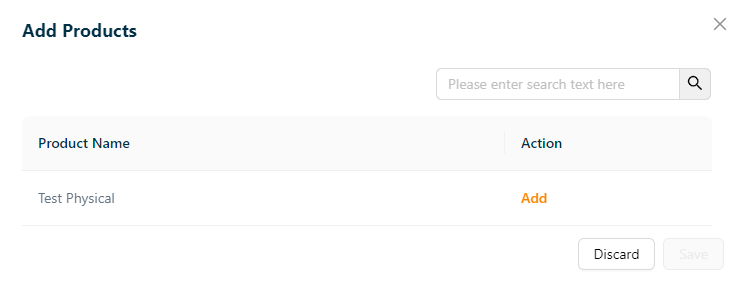
- Click Add and click Save.
On saving, the confirmation message appears as shown below.

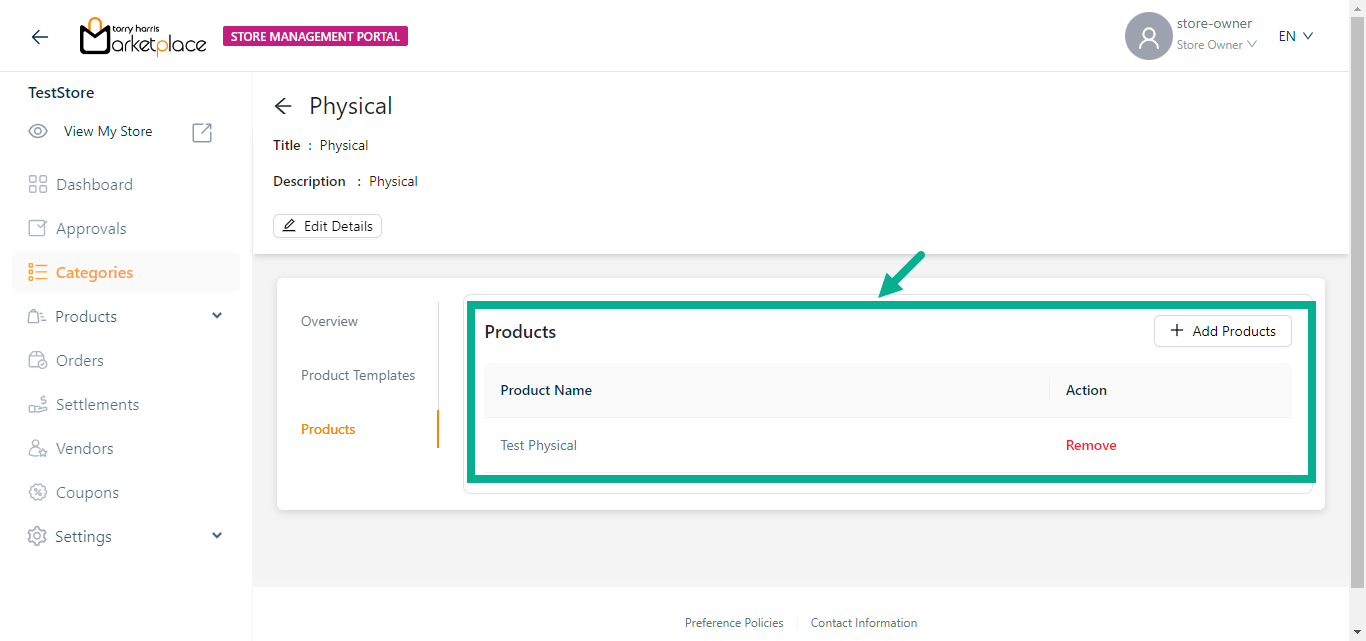
The selected products are added to the categories and appears as shown below.
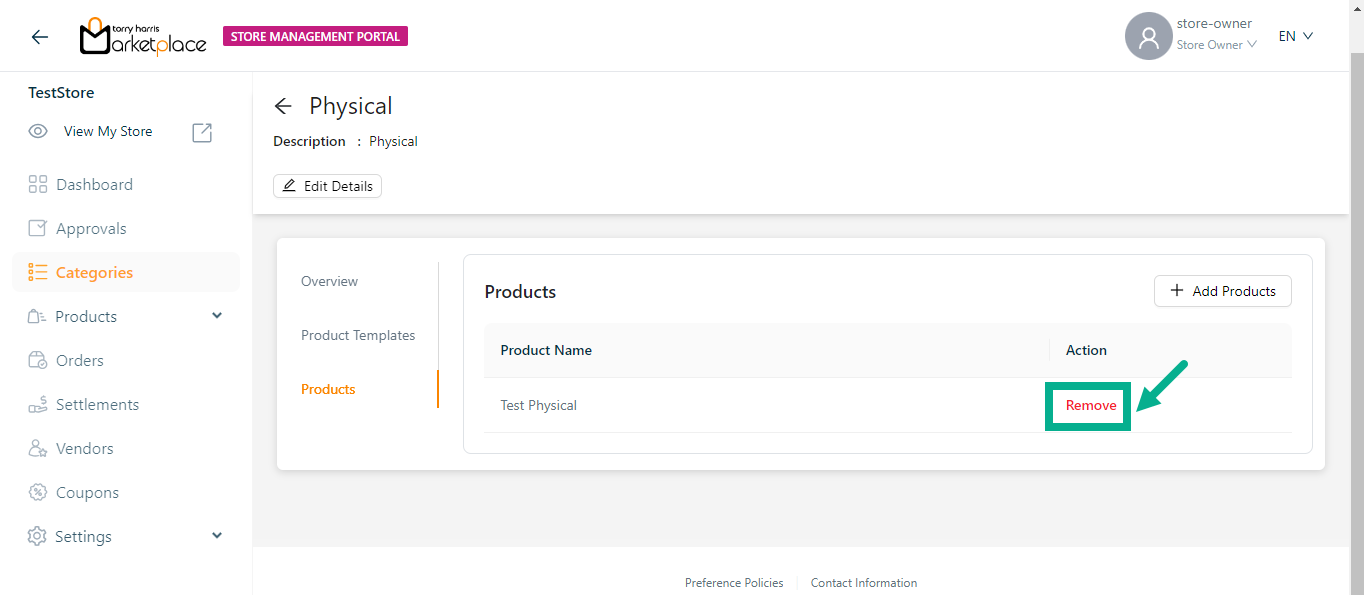
Click Remove to remove the added product if necessary.
Editing a Category
- Click Edit.
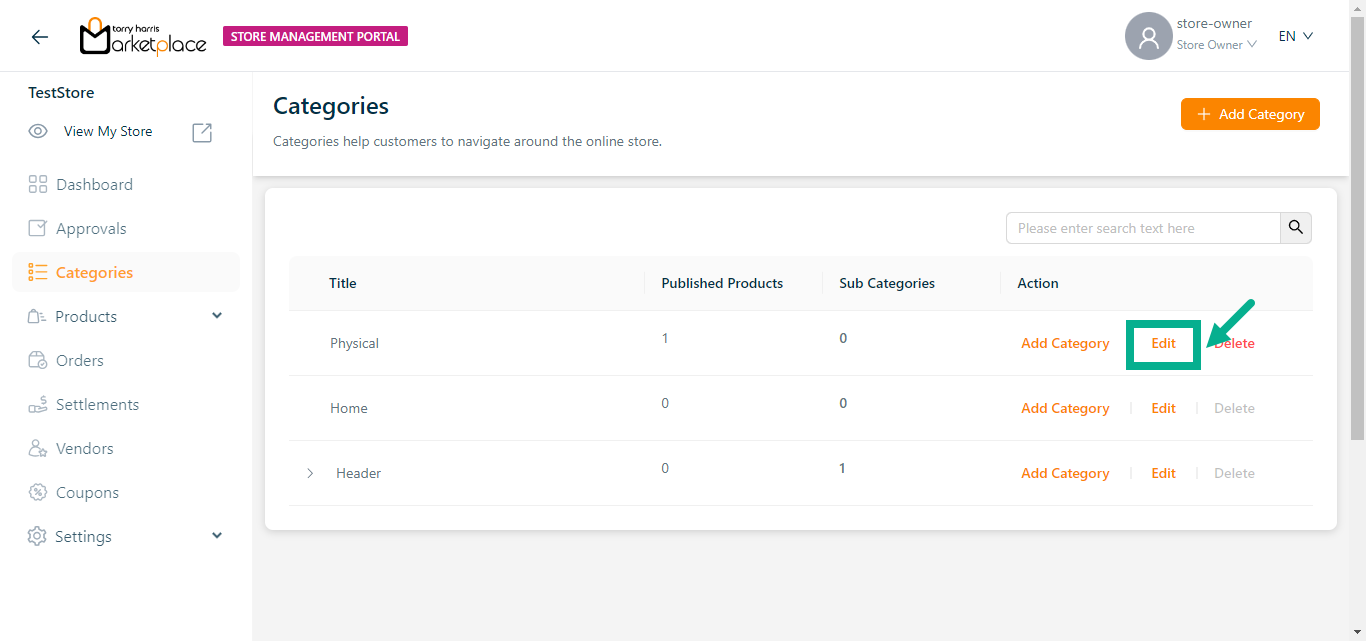
The respective category details appear as shown below.
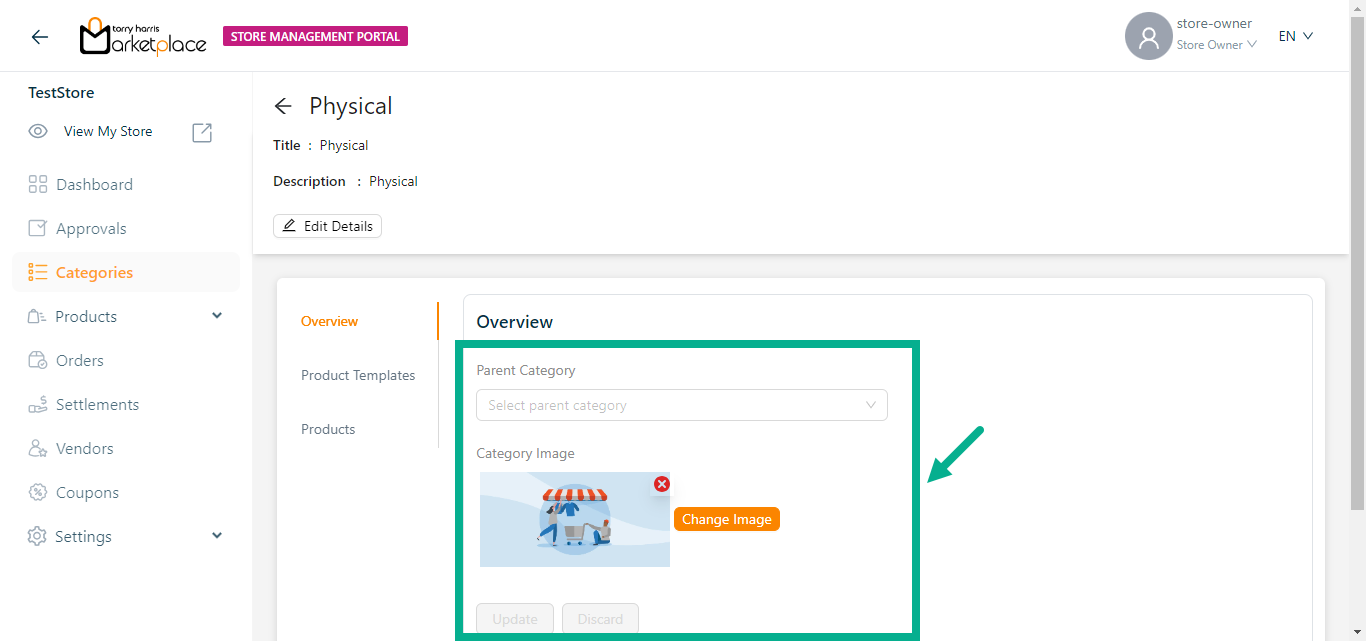
Update the Parent Category and Category Image if necessary.
Update the Product Templates if necessary.
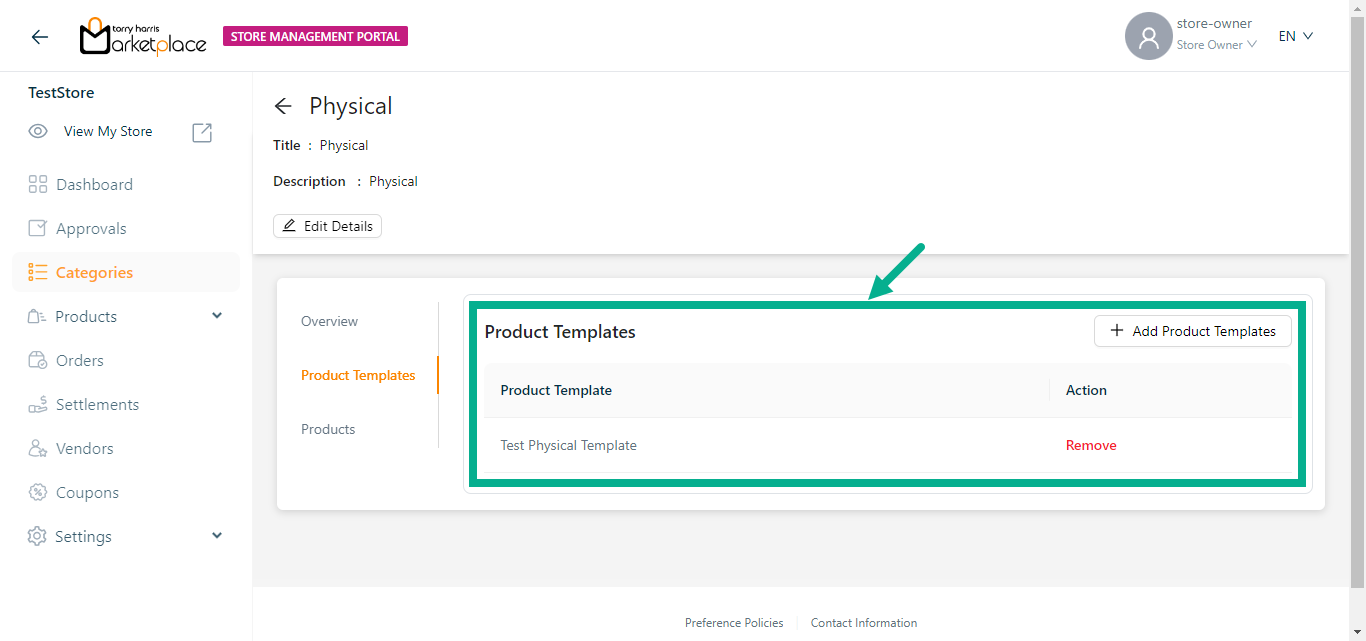
- Update the Products if necessary.
Deleting a Category
The Root category can't be deleted.
If there is one subsection in the root category, the category cannot be deleted.
- Click Delete.
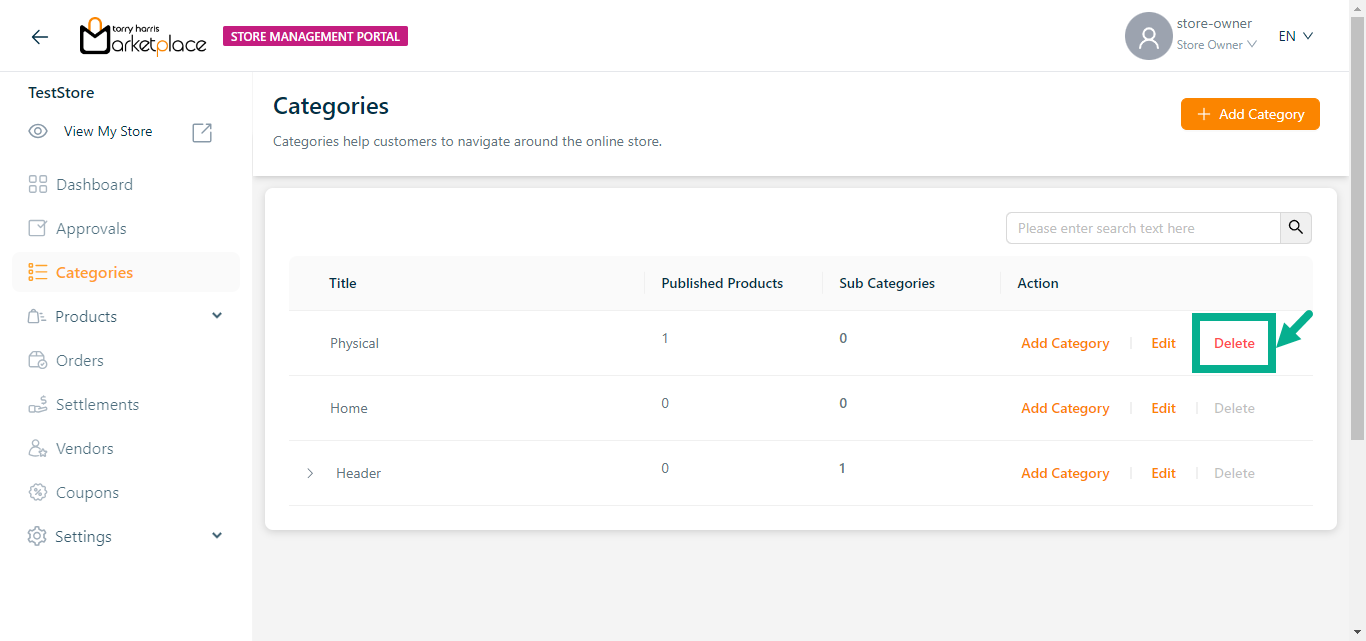
The dialogue box appears as shown below.

- Click Ok.
On deleting, the confirmation message appears as shown below.
